How to Get Started with statpx: Register, Add a Site, and See Your First Data
Getting analytics data on your website shouldn't take a full afternoon. statpx is designed so that you can go from zero to seeing real visitor data in under five minutes. This guide walks you through every step: creating your account, adding your first site, installing the two-line tracking snippet, and reading the numbers that appear.
There is nothing to install on a server, no database to configure, and no complex tag management setup. If you can paste a line of HTML, you can set up statpx.
Create Your statpx Account
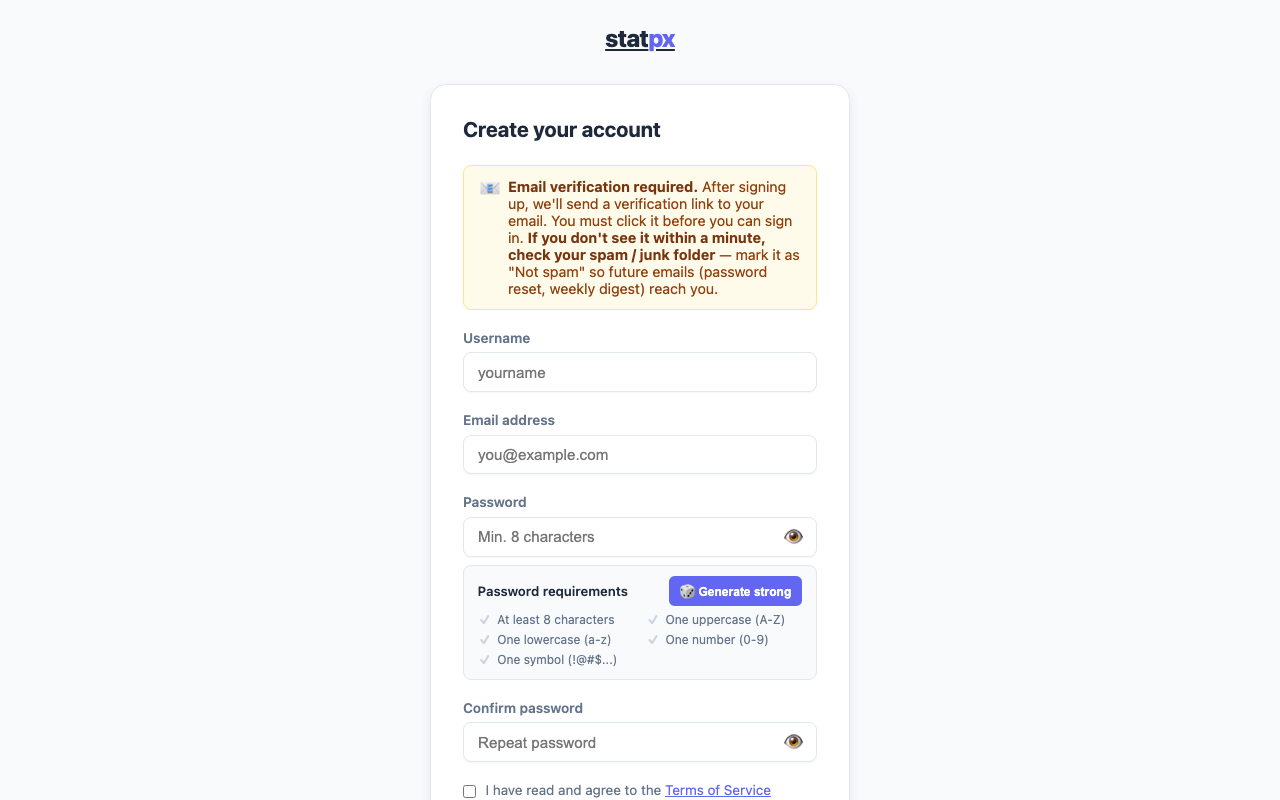
Go to https://statpx.com/register.php and fill in three fields: a username, your email address, and a password. The password field includes a strength meter — aim for at least a mix of letters, numbers, and a symbol. statpx does not use third-party sign-in (no Google or GitHub OAuth), so the email and password you enter are your permanent credentials.
After you submit the form, you will receive a confirmation email. Check your spam or junk folder if it does not arrive within a minute — transactional emails sometimes land there on first receipt. Click the confirmation link and your account becomes active immediately.
Add Your First Website
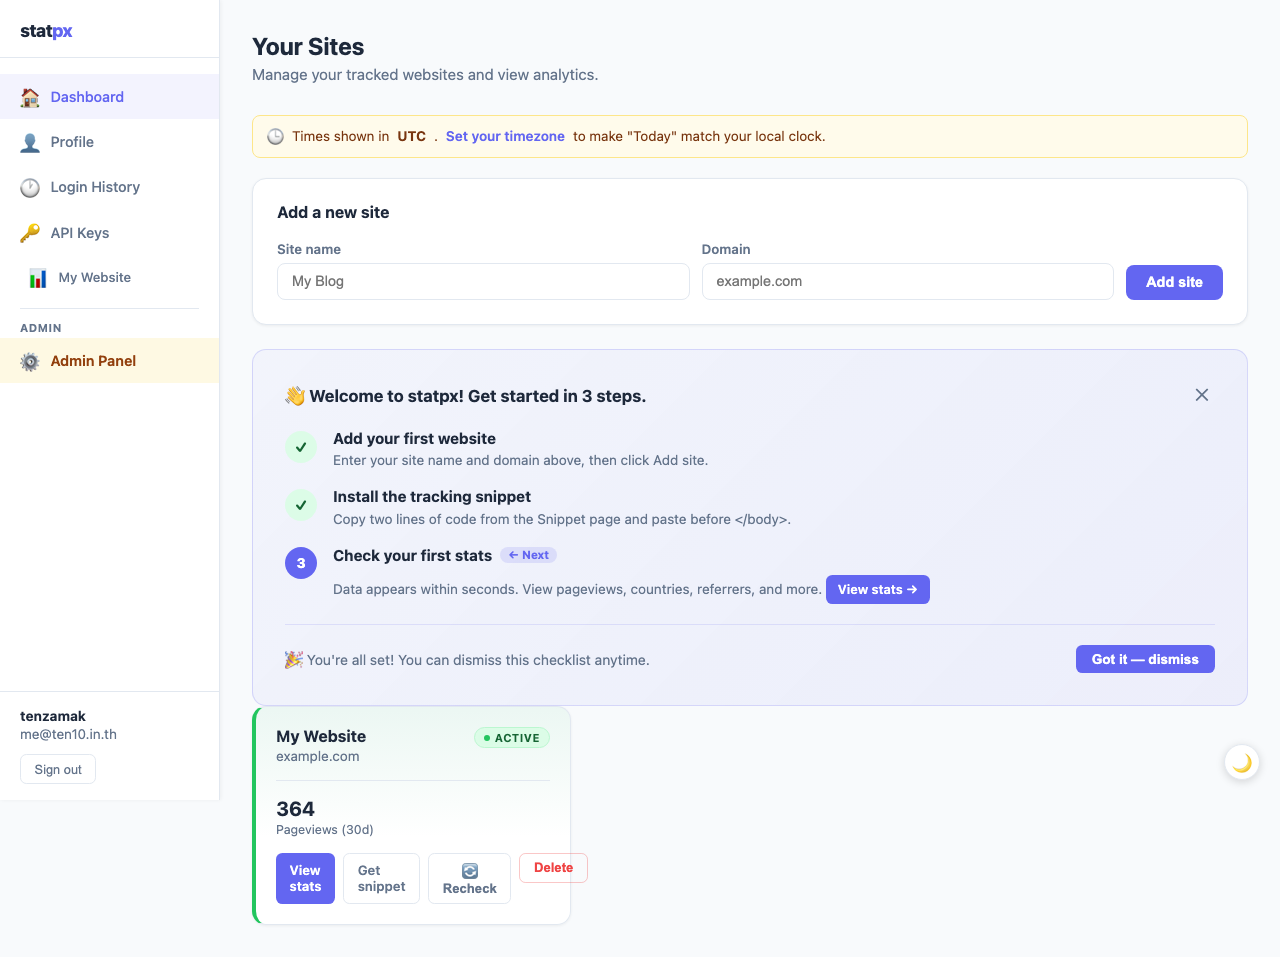
Once you are logged in, your dashboard is empty and waiting for a site. Click Add a new site at the top of the dashboard. You will see a short form with two fields:
- Site name — a label you choose, like "My Blog" or "Company Homepage." This is only for your own reference inside statpx.
- Domain — the root domain of your website, without the protocol or trailing slash. For example:
example.comorshop.example.com.
Click Add site. statpx creates a site entry and generates a unique tracking ID for it. This ID is what connects pageviews to your account — each site gets a different one, so you can track multiple websites under a single statpx login without mixing data.
Install the Tracking Snippet
Click Get snippet on your site card. The snippet page shows two lines of code. The first loads the track.js script from statpx.com. The second sets your unique site ID (_stid) so that statpx knows which site to record the pageview against.
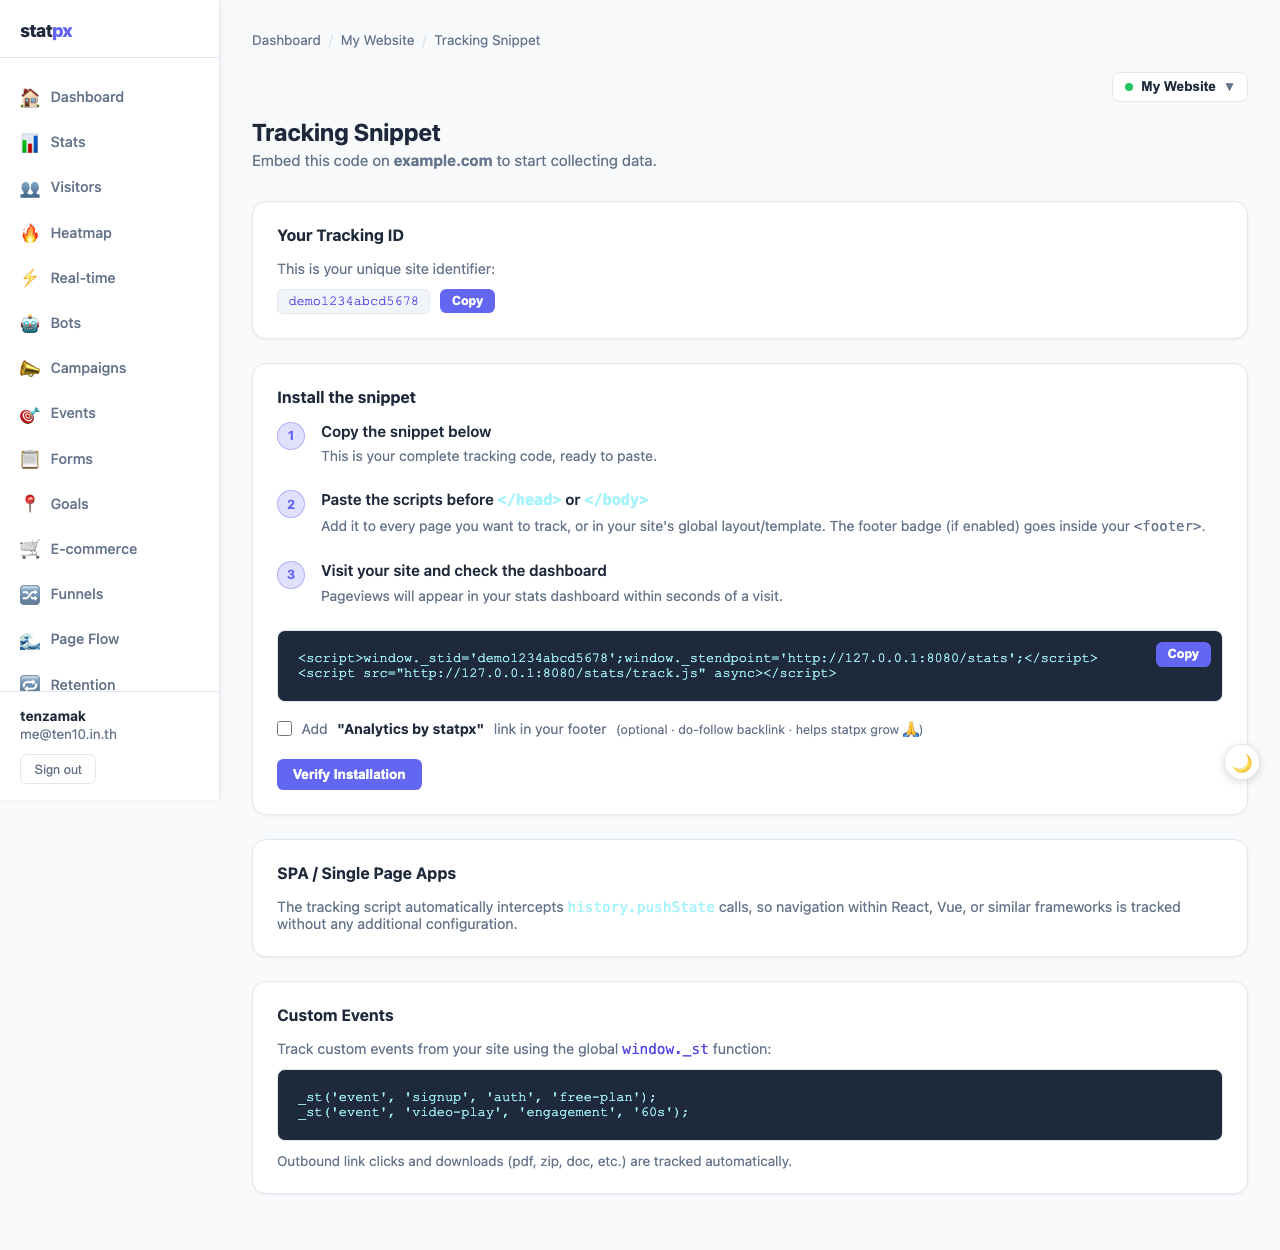
Copy both lines and paste them immediately before the closing </body> tag on every page you want to track. The placement just before </body> is intentional — it loads the script after the rest of the page content so it does not delay how quickly the page appears to visitors.
The snippet works on any website regardless of how it is built:
- Plain HTML — paste directly into your HTML files
- WordPress — use a plugin like Insert Headers and Footers, or add it to your theme's
footer.php - Next.js / React — add it via the
next/scriptcomponent withstrategy="afterInteractive"in your layout file - Shopify / Webflow — paste into the custom footer code section in theme settings
Once the snippet is on your pages, click Verify Install on the snippet page. statpx fetches your domain and checks for the tracking code. If found, the site card updates immediately with a green Active badge. If it is not detected yet, wait a moment and click Recheck on your dashboard — the verification runs again.
For a full platform-by-platform breakdown, see our guide on how to install the statpx tracking snippet.
View Your First Analytics
As soon as a real visitor loads a page that contains your snippet, a pageview appears in statpx. The data is not delayed or batched — it arrives within seconds of the visit happening. You do not need to wait until the next day or refresh on a schedule; the numbers update in real time.
On your dashboard, the site card starts showing a Pageviews (30d) count the moment the first event arrives. The Active badge in green confirms that your snippet is installed and working. Click View stats on the site card to open the full analytics dashboard for that site.
The analytics dashboard shows summary cards at the top (Pageviews, Sessions, Bounce Rate, Avg Duration), a traffic chart below, and tables for Top Pages, Top Referrers, Countries, Browsers, and Devices. The default view is Today, so you are always looking at the most current data first. For a full explanation of what each section means, read our guide on how to read the statpx analytics dashboard.
Start tracking your website for free
statpx gives you privacy-friendly analytics with no cookie banners, no data limits, and no credit card required. Set up takes under 5 minutes.
Get started free →The Bottom Line
The entire setup — from opening the registration page to seeing your first pageview land in the dashboard — takes less than five minutes if your site is already live. The only manual step is pasting the two-line snippet into your pages; everything else is automatic. Once the data starts flowing, you have a permanent, real-time record of who visits your site, where they come from, what they read, and how long they stay. That record is the foundation for every improvement you make to your content and design going forward.