
How to Install the statpx Tracking Code: A Step-by-Step Guide for Any Website
The statpx tracking snippet is two lines of HTML. Once those two lines are on your pages, statpx starts recording every pageview automatically — no additional configuration, no API calls from your server, no database changes on your end. This guide covers where to find the code, what each line does, and how to add it correctly on the most common website platforms.
Finding Your Tracking Code
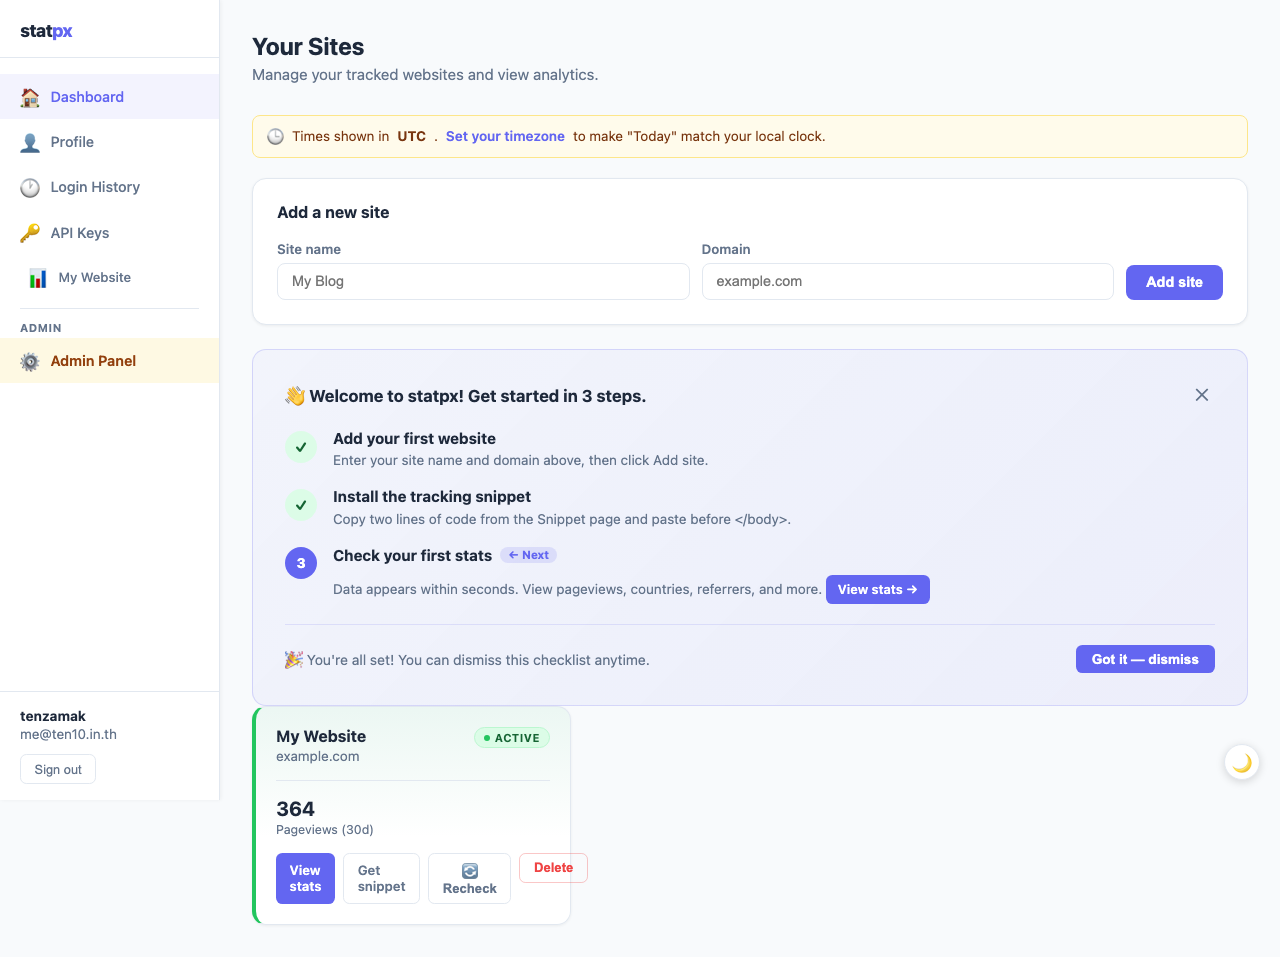
Before you can install anything, you need to locate the code that is specific to your site. Log in to statpx and go to your dashboard. Each site you have added has a card with a Get snippet button — click it for the site you want to track.
This opens the snippet page, which displays your ready-to-paste tracking code alongside a copy button. Each site in your account has a different snippet because each has a unique site ID. Do not copy the snippet from a different site and use it on another — the data would flow into the wrong property.
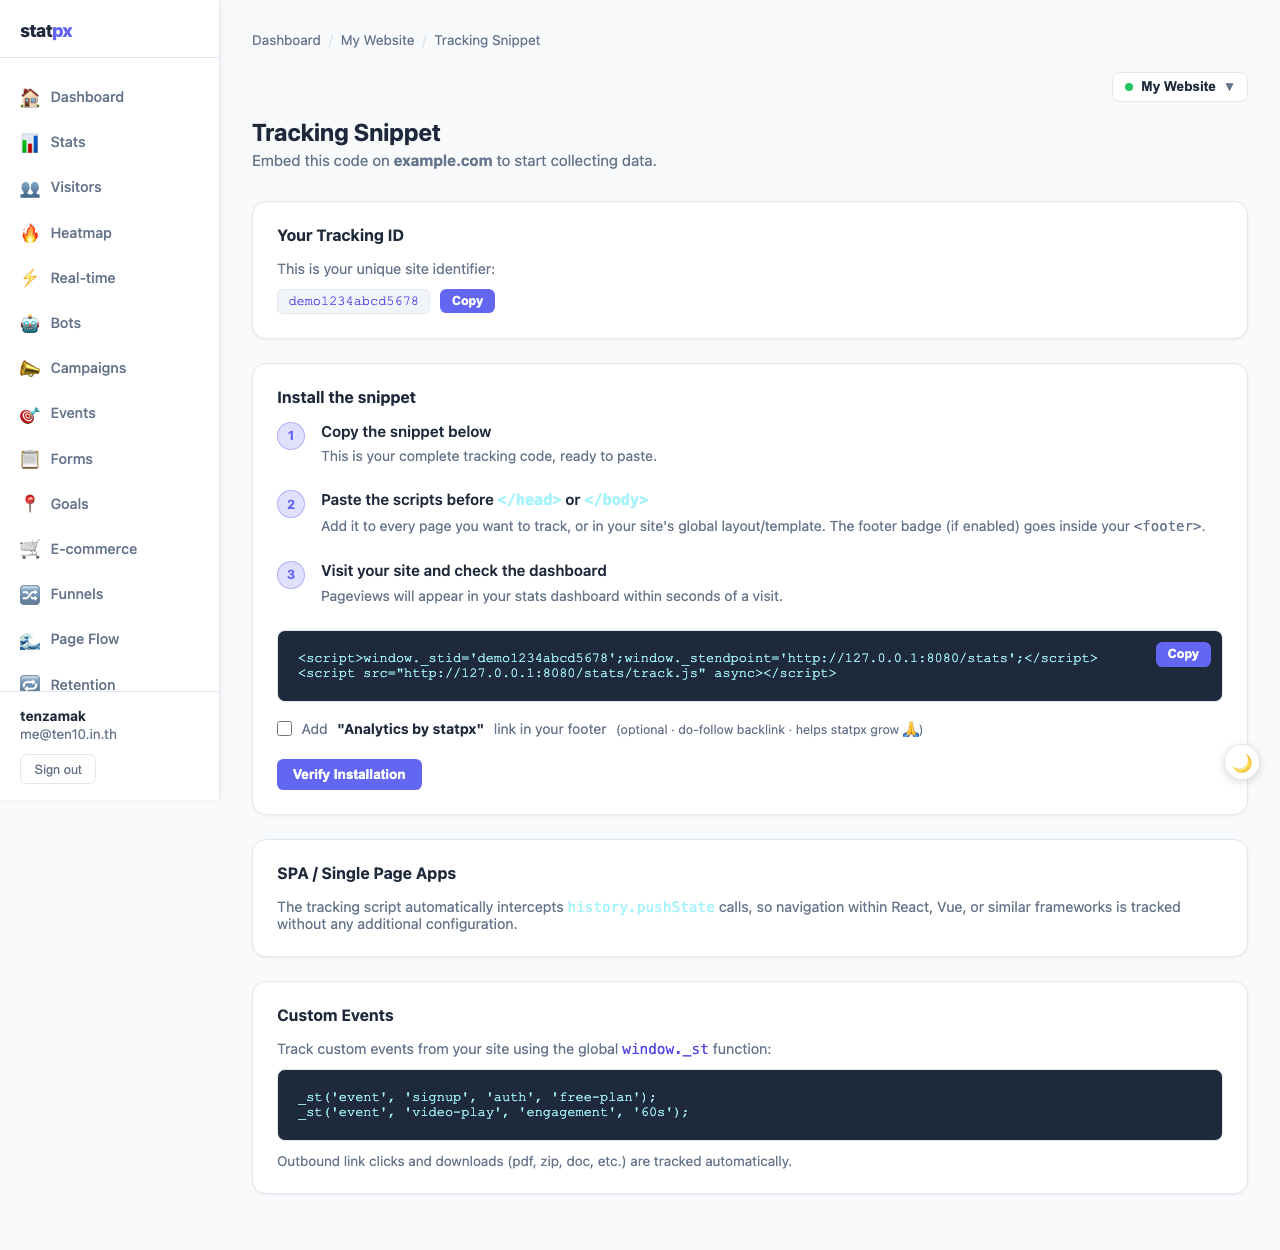
The Two-Line Snippet Explained
The snippet looks like this (with your own site ID in place of the example):
Here is what each line does:
- Line 1 loads
track.jsfrom statpx.com. Thedeferattribute tells the browser to download the script in the background and execute it only after the HTML is fully parsed — this prevents the analytics code from slowing down your page load. - Line 2 sets
window._stidto your unique site ID. Whentrack.jsruns, it reads this value to know which site to associate the pageview with. Without it, the script would not know where to send the data.
Both lines must go on every page you want to track, placed immediately before the closing </body> tag. Pages that do not include the snippet will not appear in your analytics.
Installing on Plain HTML Sites
If your website is a set of static .html files, open each file in a text editor and paste the snippet just before </body>. Here is what it looks like in context:
If you have a shared footer file that is included across all pages (common in PHP sites that use include 'footer.php'), add the snippet to that shared file once and it will appear on every page automatically.
Installing on WordPress
WordPress gives you several options, depending on how your site is set up:
Option 1 — Plugin (recommended for most users)
Install a plugin such as Insert Headers and Footers (free, widely used). Go to Settings → Insert Headers and Footers, paste the statpx snippet into the Scripts in Footer field, and save. The plugin injects the code just before </body> on every page.
Option 2 — Theme's footer.php
In your WordPress admin, go to Appearance → Theme File Editor and open footer.php. Find the closing </body> tag and paste the snippet just above it. Save the file. This approach works, but it has one risk: if you update or change your theme, the edit is overwritten. To avoid this, always use a child theme — edits to a child theme's footer.php survive theme updates.
Installing on Next.js or React
For Next.js, the cleanest approach is the built-in Script component with strategy="afterInteractive". Add the following to your root layout file (app/layout.tsx in the App Router, or pages/_app.js in the Pages Router):
The afterInteractive strategy defers script execution until the page is interactive, which matches the behaviour of the defer attribute in plain HTML. For single-page apps where the URL changes without full page reloads, see the guide on tracking analytics in React and Vue SPAs — you will need to fire a manual pageview event on each route change.
Installing on Shopify or Webflow
Both platforms provide a "custom code" section in their theme editors. In Shopify, go to Online Store → Themes → Edit code, open theme.liquid, and paste the snippet before </body>. Alternatively, use Preferences → Additional scripts if your plan supports it. In Webflow, go to Project Settings → Custom Code → Footer Code and paste there — Webflow injects it on every published page.
Verifying the Installation
After installing, go back to your statpx dashboard and click Recheck on your site card. statpx fetches your homepage and scans for the tracking code. If found, the site card shows a green Active badge with a checkmark. If not, the card shows "Snippet not detected" — double-check that the snippet is present in the HTML source of your live page (use your browser's "View page source" or DevTools).
You can also open your browser's Network tab (F12 → Network → filter by "statpx" or "track.js") and load a page on your site. You should see a request to statpx.com/collect fire within a second of the page loading — that request is a pageview being recorded.
Start tracking your website for free
statpx gives you privacy-friendly analytics with no cookie banners, no data limits, and no credit card required. Set up takes under 5 minutes.
Get started free →The Bottom Line
Installing the statpx tracking snippet comes down to pasting two lines of HTML before the closing </body> tag on every page you want to track. On any platform with a shared footer — whether that is a PHP include, a WordPress plugin, a Next.js layout file, or a theme's custom code field — you only need to add it once. Once it is there, verification takes seconds and data starts flowing immediately. If you have not set up your account yet, start with the getting started guide first.