
How to Secure Your statpx Account: 2FA, Login History, and API Keys
An analytics account contains more sensitive data than it might seem at first. Your traffic patterns reveal when your site is growing or struggling. Your referrer data shows which partnerships and campaigns are working. Your visitor log contains IP addresses and session behavior. None of this should end up in the wrong hands.
statpx provides several tools to help you keep your account secure: two-factor authentication, a full login history log, and API key management with fine-grained control. This guide walks through each one.
Why Account Security Matters for Analytics
Unlike a social media account where the harm of a compromise is obvious, an analytics account breach can be subtle and damaging in ways that aren't immediately visible:
- Traffic intelligence exposure — a competitor with access to your analytics can see exactly which pages drive the most engagement, which campaigns are working, and where your growth is coming from. That's competitive intelligence you'd never give away voluntarily.
- Goal and conversion data — if you track revenue-correlated events, a bad actor can learn your conversion rates and where drop-offs happen — data that maps directly to your business performance.
- Data tampering — someone with Editor access could delete goals, disable alerts, or create misleading funnels. Corrupted analytics data leads to bad decisions that look like correct ones.
- API key misuse — a stolen API key can be used to pull your data in bulk or integrate it into unauthorized third-party systems.
The good news: protecting your account takes under 10 minutes of setup, and statpx makes each step straightforward.
Enabling Two-Factor Authentication (2FA)
Two-factor authentication adds a second verification step to your login. Even if someone gets your password, they can't access your account without also having your authenticator app. This is the single most effective step you can take.
To enable 2FA in statpx:
- 1Go to your Profile page (click your name or avatar in the sidebar). Find the Two-Factor Authentication card and click Enable 2FA.
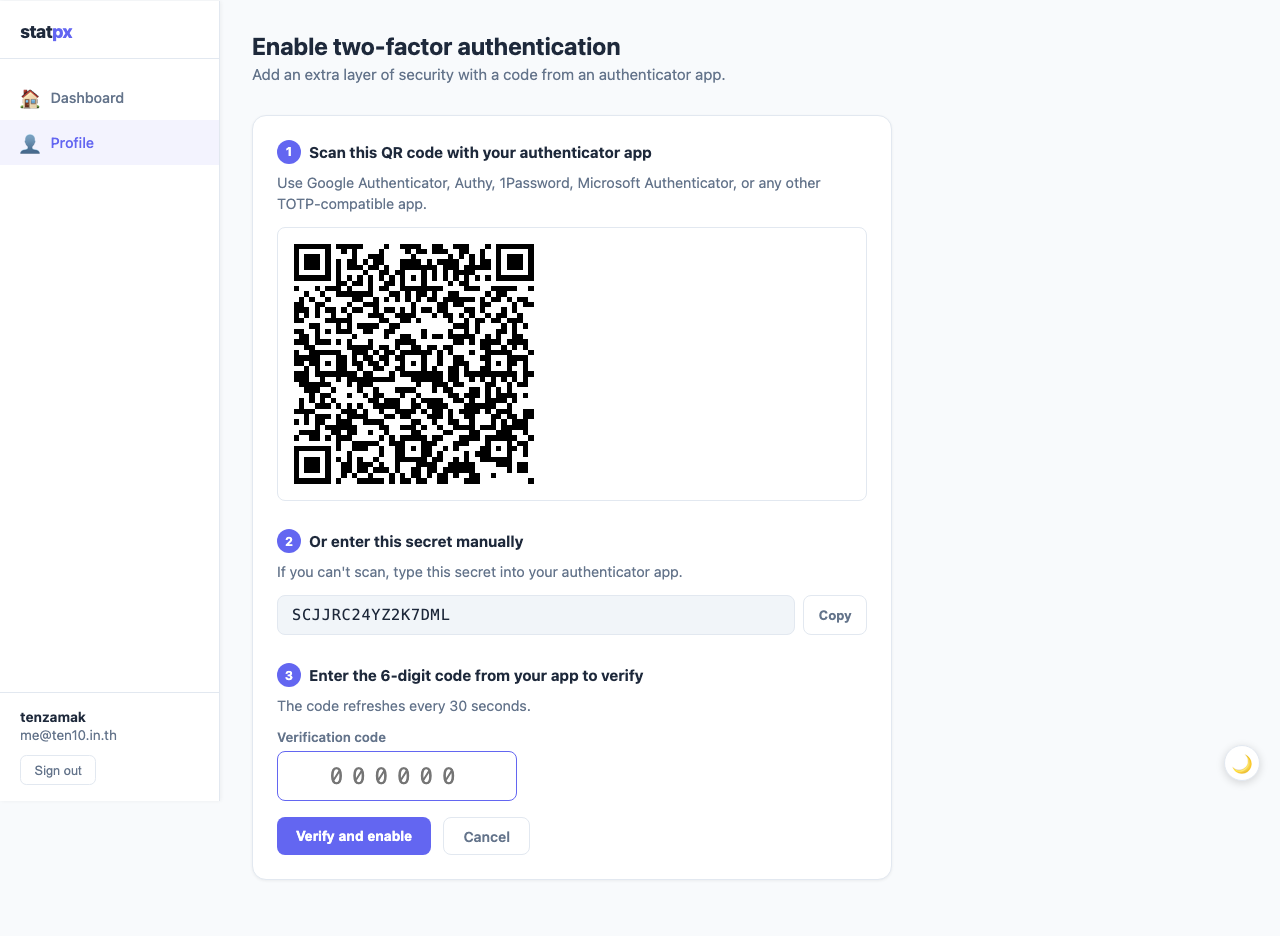
- 2A QR code appears. Open your authenticator app — Google Authenticator, Authy, 1Password, Bitwarden, or any standard TOTP app — and scan the code. The app will add a statpx entry showing a rotating 6-digit code.
- 3Enter the current 6-digit code from your app into the confirmation field and click Verify and Enable. This confirms your app is correctly synced before 2FA is activated.
- 4Save your backup codes. statpx generates a set of one-time recovery codes. Copy them into your password manager or print them and store them securely. Each code can be used exactly once to sign in if you lose access to your authenticator app.
Save your backup codes now. If you lose your authenticator app and don't have backup codes, you cannot recover access to your account. Store backup codes in a password manager — not in a plain text file on your computer.
Signing In with 2FA
Once 2FA is enabled, the login flow changes slightly:
- Enter your email and password as usual and click Sign in
- A second screen appears asking for your verification code
- Open your authenticator app and enter the current 6-digit code shown for statpx
- Click Verify — you're in
TOTP codes refresh every 30 seconds. If the code expires while you're typing, just use the next one that appears. Most authenticator apps show a timer so you know when the current code is about to rotate.
If you've lost your authenticator app — phone replaced, app deleted, new device — use one of your backup codes instead of the 6-digit rotating code. Each backup code works once, then it's invalidated. After signing in with a backup code, immediately set up 2FA again with your new device.
Reviewing Your Login History
statpx records every sign-in event to your account. To see it, go to Login History in the sidebar. Each row shows:
- Date and time — when the sign-in occurred
- IP address — the IP the login came from
- Location — country and city approximated from the IP
- Browser and OS — the user agent string parsed into a readable format
- Result — successful login or failed attempt
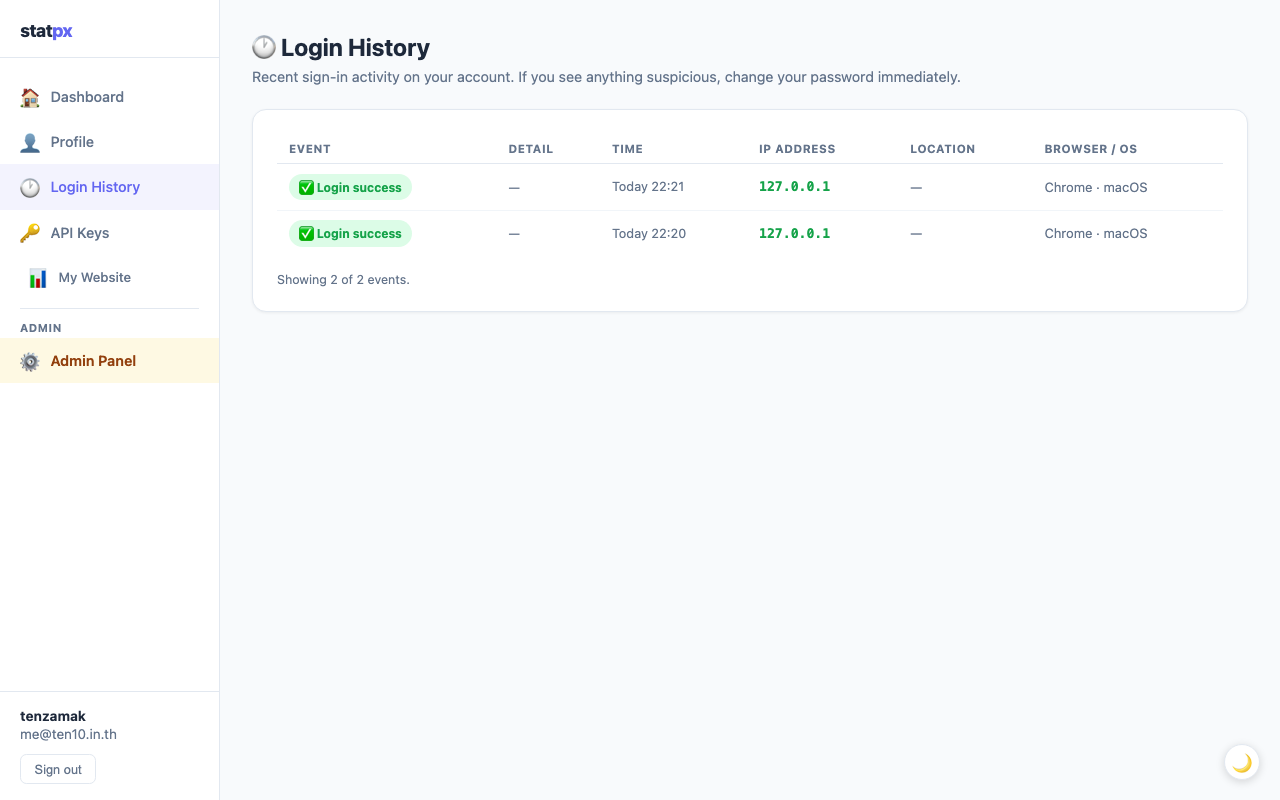
Review this list periodically and look for anything unfamiliar: a country you haven't visited, an IP address you don't recognize, a browser or OS you don't use. Any of these can indicate that your credentials were used by someone else.
If you spot suspicious activity, change your password immediately from the Profile page. Then check whether any goals, alerts, or site settings were modified during the period of suspicious access.
Tip: Set your account timezone in your Profile so that login timestamps display in your local time. Login events stored in UTC can be confusing to read — your local timezone makes it much easier to recall whether you were actually at your computer at that time.
Managing API Keys Safely
API keys let you (or your applications) pull analytics data from statpx via the REST API without using your account password. Each key acts as a credential — treat it like one.
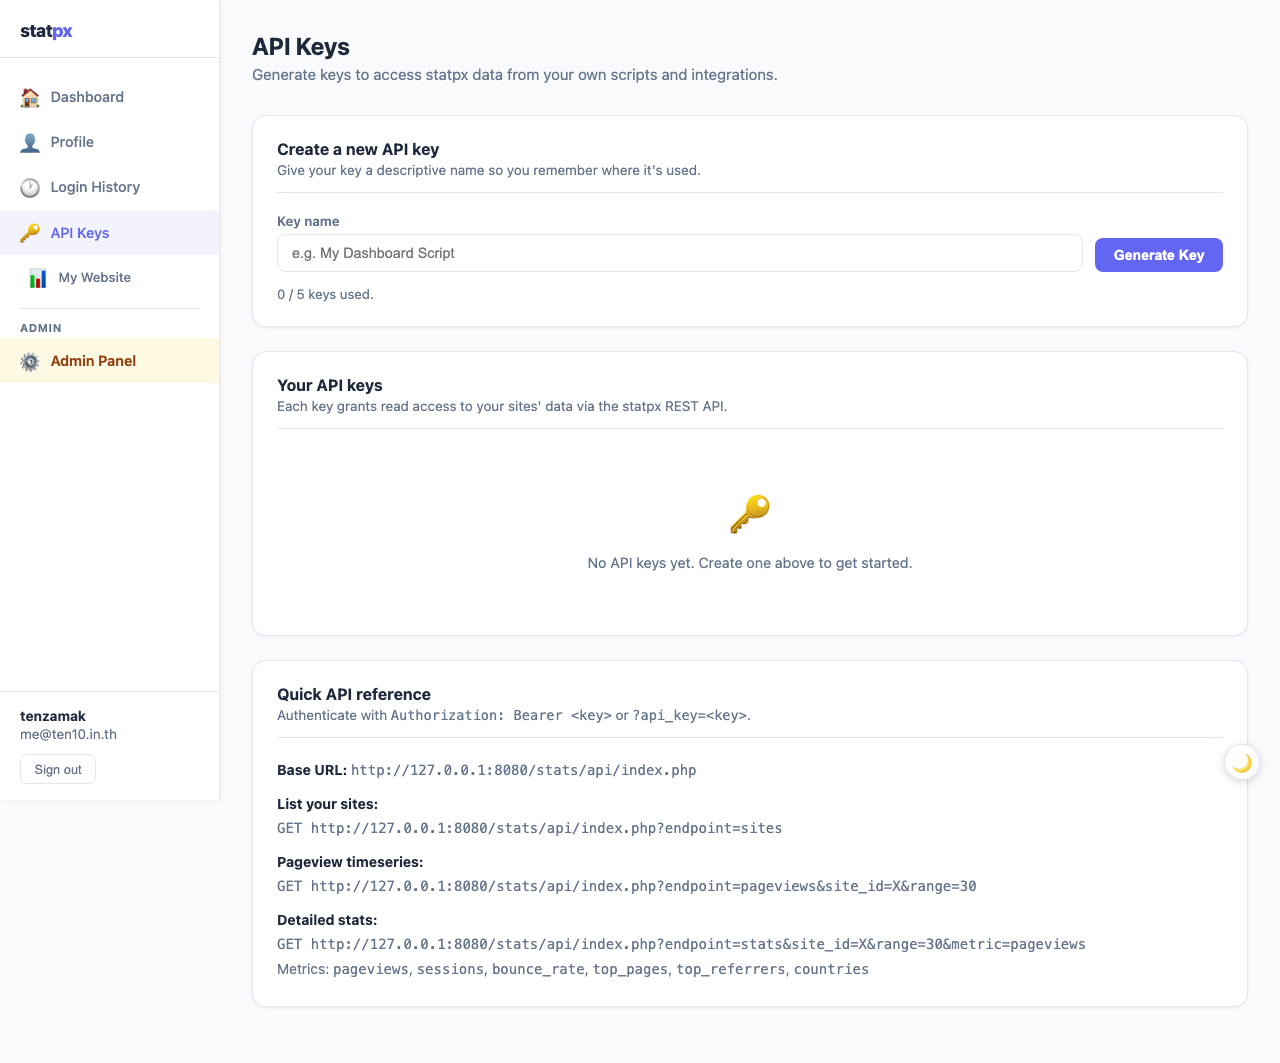
To create an API key, go to API Keys in the sidebar and click New API Key. Give it a descriptive name — something that tells you which app or script uses it (e.g. "Dashboard widget" or "Monthly report script").
Critical rules for API keys:
- Copy the key immediately on creation. statpx shows the full plaintext key exactly once. After you close the creation dialog, only the key's prefix (first 8 characters) is stored. If you lose the key, you must revoke it and create a new one.
- Store keys in a password manager or environment variable. Never paste an API key into a config file that gets committed to a git repository. Never put it in a public place. Treat it with the same care as a password.
- Revoke keys you no longer use. If you built a script that you no longer run, revoke the key it used. Active but unused keys are an unnecessary risk. The Last Used timestamp on each key makes it easy to identify stale ones.
- Create one key per use case. Don't reuse the same key across multiple apps or scripts. If one key is compromised, you can revoke just that one without affecting the others.
You can have up to 5 API keys per account. If you reach the limit, revoke an old one before creating a new one. For a full reference on what you can do with the API, see the statpx REST API guide.
Other Security Best Practices
Beyond 2FA, login history, and API key management, a few additional habits keep your account secure:
- Use a strong, unique password. statpx requires at least one uppercase letter, one lowercase letter, one digit, and one special character. Use a password manager to generate and store a long, random password — don't reuse a password from another service.
- Never share your account credentials. If a colleague or client needs access to your analytics, use the team invite system to grant them their own login with the appropriate role. Sharing credentials bypasses the audit trail and makes it impossible to tell who did what.
- Log out on shared computers. If you ever access statpx from a shared or public device, log out explicitly when you're done. Don't rely on browser tab closing to end your session.
- Keep your account email secure. Your statpx account email is also your password reset destination. If someone can access that email account, they can reset your statpx password. Make sure your email account also has 2FA enabled.
If you're part of a team or share site access with others, also review the team access guide to ensure colleagues have appropriate roles rather than full owner credentials. And if you're new to statpx and haven't set up tracking yet, start with the getting started guide.
Start tracking your website for free
statpx gives you privacy-friendly analytics with no cookie banners, no data limits, and no credit card required. Set up takes under 5 minutes.
Get started free →The Bottom Line
Securing your analytics account is a 10-minute task with lasting returns. Enable 2FA now — it's the most effective single step. Check your login history occasionally to catch anything unusual. Keep your API keys named, minimal, and revoke the ones you don't use. And use team invites instead of shared passwords whenever someone else needs access. Your analytics data reflects the real state of your business; protecting it is worth a small investment of time.